Followers

Saturday, June 23, 2018

How to add Live chat box, Subscription box and many more in Blogger

How to add Live chat box, Subscription box and many more in Blogger

Add Subscription, Live Chat Box And More Things In Blogger


Hey Guys, are you wondering to add live chat, subscription box. You have been searched a lot but your destination will end here. I will be talking to you about adding such things in Blogger. In this, you will be known to add live chat box in Blog websites or other websites too. I will also teach you to install the chat box to your blogs.

1. Add Subscription Box 
Actually, it's very important. One should have a good amount of followers to build up the websites. Here is some instruction. Do follow and add those things easily on your blog websites. 
1. First, log in with your Gmail or google address in http://app.getsitecontrol.com.
2. Click On create a widget and your preview will be shown.
3. Now you can decorate your subscription box as you want.
4.  You can set how much time will it appear in each visitors, you can set time to view it.
5. After customizing all those things just go down and click on ok.
6. Activate the widget. Now go to websites and check it.

2. Add live chat widget

Similarly, it's important to chat with visitors for good relationship of websites. It will increase your traffic and bounce rate will decrease too. It also helps to increase the time per visitors. Know how to add this.
1. First, log in with your Gmail or google address in http://app.getsitecontrol.com.
2. Click On create a widget and your preview will be shown.
3. Subsequently, customize the widget as you like.
4. You can add what to say on first when visitors started chatting.
5. After all, click on ok and then activate the widget.

3. Add Push Notification
Push notification is another features which actually increase more amount  of visitors. There are  hundred of websites online where you can add this features. One of best websites is pushengage.com.  In this websites you will be able to organize more amount of subscriber.

Problems 
The code cannot be saved in blog HTML
Hey there, this is one of the problems. It actually happens when your template is not compatible for editing and customizing. You can simply change the theme. After that it's all right, just add the code.

Some Questions( Write the answer in Comment)
1. Who is known as blog scientist in India? (Write Author name and websites URL)
2. Which are the highest earning websites in the world?
3, Can you guess the position of youtube.com websites in this world, Write the answer in Comment?

Offer:- If all the three questions answer will be correct you will get some prizes.


Sunday, June 17, 2018

What should be added in New blog websites

Things to be added in New blogs


1. Add custom Page Not Found :
 Hey there, this is one of the features of Blogger. It redirects to your websites if someone writes the wrong URL( If needed ). To add goto setting-search preferences-Custom page not found
Add this given code by turning to own the option:-

<style type="text/css"> #error-404 { border: 20px solid #1563ea; border-radius: 240px 240px 240px 240px; height: 240px; margin: 0 auto 40px; text-align: center; transition: all 0.8s ease 0s; width: 240px; } #error-404:hover { border-color: #333; } #error-404 span { color: #FA4C29; font-size: 100px; font-weight: bold; line-height: 240px; } .large-heading { font-size: 48px; line-height: 1.2em; } .light-heading { font-weight: 400; } .status-msg-bg { background-color: transparent; } .sidebar-wrapper, .page-header { display: none; } .main-wrapper { margin-right: 0; } .outer-wrapper { min-height: 0; } .status-msg-border { border: 0 none; } </style> <div id="error-404"> <span>404</span>
</div> <h2 class="large-heading" style="text-align: center;">Page not found.</h2>
<h3 class="light-heading" style="text-align: center;">Sorry, the page you were looking for on this blog does not exist.<br>You will be redirected shortly to the homepage.</h3>


2.Add custom robot txt.
To add goto setting-search preferences-custom robot txt.
This option helps your websites to rank in google and also helps to index your pages properly. Add this given code:
User-agent: Mediapartners-Google
Disallow: 

User-agent: *
Disallow: /search
Allow: /

Sitemap: https://yadavtechnicalnews.blogspot.com/sitemap.xml

3.Add custom robots header tags:
To add go to setting-search preferences-custom robots header tags
This features also help in crawling and indexing your web pages. Add by looking in this photo.

4.Custom Ads Txt.
To add goto  setting-search preferences- custom ads txt: Add this following codes
google.com, pub-5584610592334205, DIRECT, f08c47fec0942fa0
Change red code with your Adsense publisher code from earning tab.

5.Add contact us page:
To add goto pages and add the pages. Use the following code to view  well-looking contact use page. Html Code given below:
<div dir="ltr" style="text-align: left;" trbidi="on">
<div class="widget ContactForm" id="custom_ContactForm1">
<div class="contact-form-widget">
Get in touch with us by filling out the form below.<br />
<br />
<div class="form">
<form name="contact-form">
Name
<br />
<input class="contact-form-name" id="ContactForm1_contact-form-name" name="name" size="30" type="text" value="" /><br />
&nbsp;Email&nbsp;<span style="font-weight: bolder;">*</span><br />
<input class="contact-form-email" id="ContactForm1_contact-form-email" name="email" size="30" type="text" value="" /><br />
&nbsp;Message&nbsp;<span style="font-weight: bolder;">*</span><br />
<textarea class="contact-form-email-message" cols="25" id="ContactForm1_contact-form-email-message" name="email-message" rows="5"></textarea>

<input class="contact-form-button contact-form-button-submit" id="ContactForm1_contact-form-submit" type="button" value="Submit" /></form>
</div>
</div>
</div>
<br /></div>

6.Add Privacy Policies and Disclaimer Pages-
To create you can use this website. Use freeprivacypolicies.com. Moreover, you can create from this websites or you can create your websites. This page helps you to approve your Adsense very fast. This is one of the reasons to disapproved of Google Ad-sense
Privacy Policies Sample                                                   Discalaimer Sample        

7. Add attractive follow us with HTML Code                                                                          Use this HTML code to add attractive HTML code of following use in Twitter, Facebook and at all. it will look like this


<style type="text/css">

.hbzsignup-form {

    background: transparent url("https://blogger.googleusercontent.com/img/b/R29vZ2xl/AVvXsEgYtvqeM6UoprBwHmgnXtja6Nb_cxzTKTUlPm3ukaGaN1wtnzrM76AvQBNg6GrtEMRpHiyIfLbFiLRCNHQdTVbPsuVg7jFYb_xkaw3k32NzFf5m6RnIZEBwiW6csSmIjdp8OKxqy50No4uy/s1600/Email-bg.jpg") no-repeat scroll center center / 250px 150px;

    height: 150px;

    width: 250px;

    margin: 10px auto 60px auto;

}

.hbzform-inner p {
    text-align: center;
    color: #fff;
    padding: 10px;
    font: bold 18px "trebuchet MS","Tahoma";
}

.hbzemailform {
    margin: 120px auto 5px;
    width: 215px;
}

#hbzemailbox {
    background: #FEFEFE none repeat scroll 0% 0%;
    border: medium none;
    font: 12px/12px "HelveticaNeue",Helvetica,Arial,sans-serif;
    margin-right: 5px;
    box-shadow: 0px 0px 4px rgb(207, 207, 207) inset, 1px 1px 1px rgb(186, 186, 186);
    padding: 7px;
    box-sizing: content-box;
    height: 12px;
    vertical-align: top;
    display: inline-block;
}
#hbzemailbutton {
    background: transparent linear-gradient(to bottom, rgb(202, 48, 40) 0%, rgb(235, 88, 78) 100%) repeat scroll 0% 0%;
    box-shadow: 0px 0px 2px rgb(182, 37, 32) inset;
    border: medium none;
    color: #FFF;
    cursor: pointer;
    font: 13px/13px "HelveticaNeue",Helvetica,Arial,sans-serif;
    padding: 6px;
    border-radius: 5px;
    height: 27px;
    display: inline-block;
}

#hbzemailbutton:hover {
    background: transparent linear-gradient(to bottom, #CA3028 0%, #B72420 100%) repeat scroll 0% 0%;
}

.hbzsocial-icons {
    margin: 20px 0 0;
    overflow: hidden;
    display: block;
    text-align: center;
}

.hbzsocial-icons ul {
    display: inline-block;
    margin: 0 auto !important;
    text-align: center;
    padding: 0px
}

.hbzsocial-icons ul li {
    background: transparent !important;
    border: none !important;
    float: left;
    list-style-type: none !important;
    margin: 0 4px 10px !important;
    padding: 0 !important;
}

.hbzsocial-icons ul li::before,
.hbzsocial-icons ul li::after {
    display: none !important;
}

.hbzsocial-icons ul li a, .hbzsocial-icons ul li a:hover {
    background: url("https://blogger.googleusercontent.com/img/b/R29vZ2xl/AVvXsEiiGgoouCSA5jP_823nuUy7oBDva5k_oLE6Iy4SFm9qD-A8Tp2gXKoL_NpaoLI1SLHC7V3eErGIon2VPvVzFrFBgL1v6oksVEj8U51LSowC1LrHHmK2qMHwVtzTnB0_YoSvQGEGBASFlWjh/s1600/sprite_32x32.png") no-repeat scroll 0 0;
    -moz-border-radius: 50%;
    -webkit-border-radius: 50%;
    border-radius: 50%;
    display: block;
    height: 38px;
    overflow: hidden;
    text-indent: -999px;
    transition: all 0.25s linear 0s; width: 38px;
}

.hbzsocial-icons ul li.social-facebook a {
    background-color: #3b5998;
    background-position: -60px 3px;
}

.hbzsocial-icons ul li.social-twitter a {
    background-color: #00aced;
    background-position: -253px 3px;
}

.hbzsocial-icons ul li.social-gplus a {
    background-color: #dd4b39;
    background-position: -93px 3px;
}

.hbzsocial-icons ul li.social-pinterest a {
    background-color: #cb2027;
    background-position: -157px 3px;
}

.hbzsocial-icons ul li.social-rss a {
    background-color: #F87E12;
    background-position: -189px 3px;
}
.hbzsocial-icons ul li a:hover {
    background-color: #333; 
}

.hbzsocial-like {
    display: block;
    text-align: center;
}

.hbzsocial-like tbody, .hbzsocial-like tbody tr {
    display: block;
}

.hbzfb-likes {
    display: inline-block;
    padding-bottom: 15px;
    margin-right: 5px;
}

.hbztw-follow {
    display: inline
}

</style>

<div>
 <div class='hbzsignup-form'>
  <div class='hbzform-inner'>
   <p>Sign Up for Email Updates</p>
  </div>
  <div class='hbzemailform'>
   <form action='http://feedburner.google.com/fb/a/mailverify' id='subscribe' method='post' onsubmit='window.open(&apos;http://feedburner.google.com/fb/a/mailverify?uri=[Your Blog uri]&apos;, &apos;popupwindow&apos;, &apos;scrollbars=yes,width=550,height=520&apos;);return true' target='popupwindow'>
    <input name='uri' type='hidden' value='[Your Blog uri]'/>
    <input name='loc' type='hidden' value='en_US'/>
    <input id='hbzemailbox' name='email' required='' type='text' placeholder='Enter your email...'/>
    <input id='hbzemailbutton' title='' type='submit' value='Sign up'/>
   </form>
  </div>
 </div>

 <div class="hbzsocial-icons">
  <ul>
   <li class="social-facebook"><a href="https://www.facebook.com/Pokemoninhindi-1854114938219289/" target="_blank" title="Facebook">Facebook</a></li>
   <li class="social-twitter"><a href="https://twitter.com/WorldofGamingZ1" target="_blank" title="Twitter">Twitter</a></li>
   <li class="social-gplus"><a href="https://plus.google.com/u/1/108223149580028885459" target="_blank" title="Google+">Google+</a></li>
  
  </ul>
 </div>

 <table class='hbzsocial-like'>
  <tbody>
   <tr>
    <td class='hbzfb-likes'>
     <div id="fb-root">
     </div>
     <script>(function(d, s, id) {
  var js, fjs = d.getElementsByTagName(s)[0];
  if (d.getElementById(id)) return;
  js = d.createElement(s); js.id = id;
  js.src = "//connect.facebook.net/en_US/sdk.js#xfbml=1&version=v2.4";
  fjs.parentNode.insertBefore(js, fjs);
}(document, 'script', 'facebook-jssdk'));
     </script>
     <div class="fb-like" data-href="[Fb url]" data-layout="button_count" data-action="like" data-show-faces="false" data-share="false">
     </div>
    </td>
    <td class='hbztw-follow'>
     <a href="https://twitter.com/WorldofGamingZ1" class="twitter-follow-button" data-show-count="true" data-show-screen-name="false" data-dnt="true">Follow @subeshyadav91</a>
     <script>!function(d,s,id){var js,fjs=d.getElementsByTagName(s)[0],p=/^http:/.test(d.location)?'http':'https';if(!d.getElementById(id)){js=d.createElement(s);js.id=id;js.src=p+'://platform.twitter.com/widgets.js';fjs.parentNode.insertBefore(js,fjs);}}(document, 'script', 'twitter-wjs');
     </script>
    </td>
   </tr>
  <tbody>
 </tbody></tbody></table>
</div>

Note-  In case of any help Contact me on contact us page.

Thursday, May 31, 2018

How to fix Adsense does not meet criteria

Adsense

Adsense is the big Company who need non-violent and attractive and easy navigation system. Your websites should be responsive so that viewers can be easily known about the content. It needs a websites having good content and some traffic should be needed.

Dear Viewers,

This is Adsense criteria. Here are the policy and rules to be followed by everyone. Click The link.
Adsense Program policies

Above given policy should be used by all the blogger and other websites builder too.
This is the reason to get disapproved. Due to program criteria, they get disapproved. If this occurs then it means you websites are cheating others and has no original content.

Some of your mistakes:

Plagiarism: You used to copy and paste the article. This leads to plagiarism and your Adsense get rejected. Here are the tricks to copy article without plagiarism.
 a. Just copy the content and use google translate. Translate the article into Hindi language and again change Hindi article into English. If you do you will not get disapproved i.e no plagiarism.

Duplicate content: Google will never accept a blog that that features copied or scraped content. If you’ve copied an article from other site and published it on your blog, no matter how many times you apply for AdSense, your blog will never get approved. So make sure that your site is free from duplicate content. You can use tools like Copyscape or indicates to find duplicate lines, statements or paragraphs in your blog posts.

Little traffic: The best and the easiest way to get an approved AdSense account is to create 4 to 5 best high-quality blog posts and posts as much as good content to your websites. Once your site starts getting 1000+ visitors from Google or Bing search engines, submit an AdSense application and ads will start showing on your blog.

Direct Links: Don't add other direct links like- other youtube videos and any links to download films, games, software. Don't add other links.

Invalid Click: Don't use tricks to see your own websites, again and again, many times.
4. Don't force other to subscribe your blogs. It means don't add popup email before Adsense approve.

How to fix it?
1. At first turn off your Adsense in earning tab, and lookout all your posts.
2. Remove plagiarized i.e copied article and use your own article or use the above tricks.
3. Remove all videos and direct links from your websites.
4. Add privacy policies, disclaimer, contact us page and add cookies to your websites. ( From siltride.com )
5. Remove page which violet policy and fix it.
6. Remove other infected links.

Or 
7. Just start your journey from first i.e delete all pots and start from first.

Why I Do?
So bloggers do concentrate here. Don't copy other articles. Adsense takes it as a crime. So don't do that from today and work yourself with hard work.

Complainant- If you have any other questions just ask in the comment below And If you find it's informative please share on social media too!

Friday, April 27, 2018

How to customize blogger with HTML code

Here are some HTML, Use to make a blog attractive

1. If you want to add a top button scroller then just use this code.
Here are some code is given add in the same place. Misuse may not work. It will help to make your blogger attractive.

<head>
<meta name="viewport" content="width=device-width, initial-scale=1">
<style>
body {
  font-family: Arial, Helvetica, sans-serif;
  font-size: 20px;
}

#myBtn {
  display: none;
  position: fixed;
  bottom: 20px;
  right: 30px;
  z-index: 99;
  font-size: 18px;
  border: none;
  outline: none;
  background-color: red;
  color: white;
  cursor: pointer;
  padding: 15px;
  border-radius: 4px;
}

#myBtn:hover {
  background-color: #555;
}
</style>
</head>
<body>

<button onclick="topFunction()" id="myBtn" title="Go to top">Top</button>

<div style="background-color:black;color:white;padding:30px">Scroll Down</div>
<div style="background-color:lightgrey;padding:30px 30px 2500px">This example demonstrates how to create a "scroll to top" button that becomes visible when the user starts to scroll the page.</div>

<script>
// When the user scrolls down 20px from the top of the document, show the button
window.onscroll = function() {scrollFunction()};

function scrollFunction() {
    if (document.body.scrollTop > 20 || document.documentElement.scrollTop > 20) {
        document.getElementById("myBtn").style.display = "block";
    } else {
        document.getElementById("myBtn").style.display = "none";
    }
}

// When the user clicks on the button, scroll to the top of the document
function topFunction() {
    document.body.scrollTop = 0;
    document.documentElement.scrollTop = 0;
}
</script>

</body>
3. Seo Pack By Subesh Yadav
<!-- All in One SEO Pack for blogger by Subesh Yadav -->
<meta charset='utf-8'/>
<meta content='width=device-width, initial-scale=1, maximum-scale=1' name='viewport'/>
<meta content='blogger' name='generator'/>
<meta content='text/html; charset=UTF-8' http-equiv='Content-Type'/>
<link href='http://www.blogger.com/openid-server.g' rel='openid.server'/>
<link expr:href='data:blog.homepageUrl' rel='openid.delegate'/>
<link expr:href='data:blog.url' rel='canonical'/>
<b:if cond='data:blog.pageType == &quot;index&quot;'>
<title><data:blog.pageTitle/></title>
<b:else/>
<b:if cond='data:blog.pageType != &quot;error_page&quot;'>
<title><data:blog.pageName/></title>
</b:if></b:if>
<b:if cond='data:blog.pageType == &quot;error_page&quot;'>
<title>Page Not Found - <data:blog.title/></title>
</b:if>
<b:if cond='data:blog.pageType == &quot;archive&quot;'>
<meta content='noindex' name='robots'/>
</b:if>
<b:if cond='data:blog.searchLabel'>
<meta content='noindex,nofollow' name='robots'/>
</b:if>
<b:if cond='data:blog.isMobile'>
<meta content='noindex,nofollow' name='robots'/>
</b:if>
<b:if cond='data:blog.pageType != &quot;error_page&quot;'>
<meta expr:content='data:blog.metaDescription' name='description'/>
<b:if cond='data:blog.homepageUrl != data:blog.url'>
<meta expr:content='data:blog.pageName + &quot;, &quot; + data:blog.pageTitle + &quot;, &quot; + data:blog.title' name='keywords'/>
</b:if></b:if>
<b:if cond='data:blog.url == data:blog.homepageUrl'>
<meta content='Subesh yadav websites, yadav technical news, Technical news, navodaya shishu sadan, yadav tech, subesh yadav tips and tricks technical news latest tips' name='keywords'/></b:if>
<link expr:href='data:blog.homepageUrl + &quot;feeds/posts/default&quot;' expr:title='data:blog.title + &quot; - Atom&quot;' rel='alternate' type='application/atom+xml'/>
<link expr:href='data:blog.homepageUrl + &quot;feeds/posts/default?alt=rss&quot;' expr:title='data:blog.title + &quot; - RSS&quot;' rel='alternate' type='application/rss+xml'/>
<link expr:href='&quot;http://www.blogger.com/feeds/&quot; + data:blog.blogId + &quot;/posts/default&quot;' expr:title='data:blog.title + &quot; - Atom&quot;' rel='alternate' type='application/atom+xml'/>
<b:if cond='data:blog.pageType == &quot;item&quot;'>
<b:if cond='data:blog.postImageThumbnailUrl'>
<link expr:href='data:blog.postImageThumbnailUrl' rel='image_src'/>
</b:if></b:if>
<b:if cond='data:blog.url == data:blog.homepageUrl'>
<b:if cond='data:blog.pageType == &quot;item&quot;'>
<b:if cond='data:blog.pageType == &quot;static_page&quot;'>
<b:if cond='data:blog.url'>
<meta expr:content='data:blog.url' property='og:url'/>
</b:if>
<meta expr:content='data:blog.title' property='og:site_name'/>
<b:if cond='data:blog.pageName'>
<meta expr:content='data:blog.pageName' property='og:title'/>
</b:if>
<meta content='website' property='og:type'/></b:if></b:if></b:if>
<b:if cond='data:blog.postImageThumbnailUrl'>
<meta expr:content='data:blog.postImageThumbnailUrl' property='og:image'/>
<b:else/></b:if>
<link href='/favicon.ico' rel='icon' type='image/x-icon'/>
<link href='https://plus.google.com/GOOGLE+ID/posts' rel='publisher'/>
<link href='https://plus.google.com/GOOGLE+ID/about' rel='author'/>
<link href='https://plus.google.com/GOOGLE+ID' rel='me'/>
<meta content='GOOGLE-WEBMASTER-CODE' name='google-site-verification'/>
<meta content='BING-WEBMASTER-CODE' name='msvalidate.01'/>
<meta content='ALEXA-VERIFY-CODE' name='alexaVerifyID'/>
<meta content='Sylhet, Bangladesh' name='geo.placename'/>
<meta content='YOUR-NAME' name='Author'/>
<meta content='general' name='rating'/>
<meta content='Bangladesh' name='geo.country'/>
<meta content='en_US' property='og:locale'/>
<meta content='en_GB' property='og:locale:alternate'/>
<meta content='english' name='language'/>
<meta content='https://www.facebook.com/username' property='article:author'/>
<meta content='https://www.facebook.com/page_username' property='article:publisher'/>
<meta content='FACEBOOK-APP-ID' property='fb:app_id'/>
<meta content='FACEBOOK-ADMIN-ID' property='fb:admins'/>
<meta content='@msubelbd' name='twitter:site'/>
<meta content='@msubelbd' name='twitter:creator'/>

<!-- End of All in One SEO Pack for blogger by Subesh Yadav -->


2. If you want to add sign in Button then follow my instructions:-

1. Just create the forum which contains a name, email, phone no and other things that you want. You can create this online and add in page HTML.
2. Just download the sign-up bottom image from google.
3. Go to layout and add to top header. Use image and just add that button and give the link and it will work as sign up the bottom of websites.

3.  HTML code to make contact us page.
<div dir="ltr" style="text-align: left;" trbidi="on">
<div class="widget ContactForm" id="custom_ContactForm1">
<div class="contact-form-widget">
Get in touch with us by filling out the form below.<br />
<div class="form">
<form name="contact-form">
Name
<br />
<input class="contact-form-name" id="ContactForm1_contact-form-name" name="name" size="30" type="text" value="" />

Email
<span style="font-weight: bolder;">*</span>
<br />
<input class="contact-form-email" id="ContactForm1_contact-form-email" name="email" size="30" type="text" value="" />

Message
<span style="font-weight: bolder;">*</span>
<br />
<textarea class="contact-form-email-message" cols="25" id="ContactForm1_contact-form-email-message" name="email-message" rows="5"></textarea>

<input class="contact-form-button contact-form-button-submit" id="ContactForm1_contact-form-submit" type="button" value="Submit" /></form>
</div>
</div>
</div>
<br /></div>
Add contact us page
<h3>Contact Form</h3>

<div class="container">
  <form action="/action_page.php">
    <label for="fname">First Name</label>
    <input type="text" id="fname" name="firstname" placeholder="Your name..">

    <label for="lname">Last Name</label>
    <input type="text" id="lname" name="lastname" placeholder="Your last name..">

    <label for="country">Country</label>
    <select id="country" name="country">
      <option value="australia">Australia</option>
      <option value="canada">Canada</option>
      <option value="usa">USA</option>
    </select>

    <label for="subject">Subject</label>
    <textarea id="subject" name="subject" placeholder="Write something.." style="height:200px"></textarea>

    <input type="submit" value="Submit">
  </form>

</div>

Add CSS
<style>
body {font-family: Arial, Helvetica, sans-serif;}

input[type=text], select, textarea {
    width: 100%;
    padding: 12px;
    border: 1px solid #ccc;
    border-radius: 4px;
    box-sizing: border-box;
    margin-top: 6px;
    margin-bottom: 16px;
    resize: vertical;
}

input[type=submit] {
    background-color: #4CAF50;
    color: white;
    padding: 12px 20px;
    border: none;
    border-radius: 4px;
    cursor: pointer;
}

input[type=submit]:hover {
    background-color: #45a049;
}

.container {
    border-radius: 5px;
    background-color: #f2f2f2;
    padding: 20px;
}

</style>
Note- In case of any problem regarding blogger tips, Seo, customization and other related things than just comment me.

Thursday, April 26, 2018

Top 5 ads company to approve websites fast

Some blogger advance tips with an example:-

# Best Adsense Company to monetize websites with good income:-

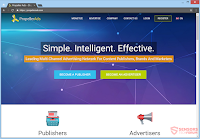
  1.Propeller.com-
This is one of the websites where you can earn a lot of money than Adsense and other websites. Here you just need to create an account and just add your websites there and it's very easy to approve. 
Features-
1. Easy Sign up the process. 
2. Easy and free to use.
3. Approval very fast.
4. Good Ads maintenance. 


2. Revenue Hits.com
 This is also websites which provide ads and it's very easy to get approval. It is also one of the easiest and simple websites from that you can earn enough amount of money.
Features-
1. Easy sign-up process.
2.Fastest approval 
3. More earning
4. Manual Ads manager.


3.Yllix.com 
This is also of the best websites where you one can earn 50 $ per days if he/she has got the good amount of traffic. It is also very easy to get approved but you should have at least 500 impressions in order to get approval within one day. Here you just need to add HTML code in order to show ads in your pages and at all.
Features-
1. Very fast sign up
2. Approve fast But good traffic needed.
3. Good earnings.
4. Manual Ads adding process.

4.Infolinks.com
This is also good websites to earn money with a newer version of websites. These websites don't have much more criteria and it's very easy to get approved. Although, if you have got bad and not nice websites, it's sure to get approved. So it is only for not technical people websites i.e if you are children and you have created websites and if you are not getting approved then it's best to get approved.
Features-
1. Easy sign-up process.
2.Approve 100 %  within one day
3. Good earnings.
4. Manual Ads adding process.

Some popular Google Adsense companies:-
1.  Google Adsense-
All the people who are interrelated with the youtube channel, websites, android app, software builder, they all are known about the Adsense company. It is the biggest and most popular company provided by the Google INC. They need Google Adsense in order to earn money form traffic. So it is one of the best company to earn good amount of money online.
When we talk about making money from a blog, the easiest method of doing so is to put
 AdSense on your blog and start writing content.
Once people click on the AdSense ads posted on your blog, you will earn money. 
(Remember to avoid clicking on your own ads, as this is a violation of AdSense policies.)
AdSense is an appropriate ad network, which means that ads will be displayed according to your content. For example, if you are writing a post on web hosting, you are more likely to see ads related to hosting or domains.
"Another method shows Adsense by using cookie technology. Users are created in search history, they display targeted ads that are well-charged."

It means, AdSense makes sure that readers will see targeted ads, and thus you will get more clicks and higher payouts than you will with any other ad network.

Features-
1. Auto Ads.
2. Responsive ads.
3. Choice ads.
4. Many ads options.
5. Good earnings.
6. Admob features.

2. Media.net-
This is more popular than Google Adsense. It is very difficult to get approved for this company. Much more traffic is needed in order to get approved in this company. Here you can earn more money than others company Adsense company. It is regarded as the much paying company.
Features-

  • Revenue and ROI optimization capabilities
  • Superior technology capabilities
  •          Widespread feature set to meet all needs without having to manage multiple liberated retailers
  • Very easy to use and integrate
  • Scalability with 100% uptime
  • The highly-optimized solution for high speed and low-latency
  • Traffic quality and compliance management capabilities
  • Highly cost optimized serving infrastructure 
  • Know More
Media.net has 800+ employees in key operation centers across - New York, Los Angeles, Dubai, Zurich, Mumbai & Bangalore. "The US headquarters of MediaNet is based in New York and Global Headquarters in Dubai. Media Traffic Distribution (Q1 2016) by Advertising Expense / Revenue:"
Media.net Traffic Distribution by Ad Spend/Revenues (as at Q1 2016):
By RegionBy Device Type
US: 90%Mobile: 52%
UK, CA: 5%Desktop: 48%
Rest of World: 5%
.

Note- If you have any problem regarding sign up and the approval than just contact me or comment me?

Friday, April 20, 2018

How to add menu to sidebar in blogger With HTML Code

How to add a menu to the sidebar in blogger With HTML Code:


1. Go to the theme and click on edit template.
2. You can use these code-


Sidebar Menu Html Code
Best style-
<meta name="viewport" content="width=device-width, initial-scale=1">
<style>
body {
    font-family: "Lato", sans-serif;
}

.sidenav {
    height: 100%;
    width: 0;
    position: fixed;
    z-index: 1;
    top: 0;
    left: 0;
    background-color: #111;
    overflow-x: hidden;
    transition: 0.5s;
    padding-top: 60px;
}

.sidenav a {
    padding: 8px 8px 8px 32px;
    text-decoration: none;
    font-size: 25px;
    color: #818181;
    display: block;
    transition: 0.3s;
}

.sidenav a:hover {
    color: #f1f1f1;
}

.sidenav .closebtn {
    position: absolute;
    top: 0;
    right: 25px;
    font-size: 36px;
    margin-left: 50px;
}

@media screen and (max-height: 450px) {
  .sidenav {padding-top: 15px;}
  .sidenav a {font-size: 18px;}
}
</style>

<div id="mySidenav" class="sidenav">
  <a href="javascript:void(0)" class="closebtn" onclick="closeNav()">&times;</a>
  <a href="#">About</a>
  <a href="#">Services</a>
  <a href="#">Clients</a>
  <a href="#">Contact</a>
</div>

<h2>Animated Sidenav Example</h2>
<p>Click on the element below to open the side navigation menu.</p>
<span style="font-size:30px;cursor:pointer" onclick="openNav()">&#9776; open</span>

<script>
function openNav() {
    document.getElementById("mySidenav").style.width = "250px";
}

function closeNav() {
    document.getElementById("mySidenav").style.width = "0";
}
</script>

   
Other Style
<title>W3.CSS</title>
<meta name="viewport" content="width=device-width, initial-scale=1">
<link rel="stylesheet" href="https://www.w3schools.com/w3css/4/w3.css">
<body>

<!-- Sidebar -->
<div class="w3-sidebar w3-light-grey w3-bar-block" style="width:25%">
  <h3 class="w3-bar-item">Menu</h3>
  <a href="#" class="w3-bar-item w3-button">Link 1</a>
  <a href="#" class="w3-bar-item w3-button">Link 2</a>
  <a href="#" class="w3-bar-item w3-button">Link 3</a>
</div>

<!-- Page Content -->
<div style="margin-left:25%">

<div class="w3-container w3-teal">
  <h1>My Page</h1>
</div>

<img src="img_car.jpg" alt="Car" style="width:100%">

<div class="w3-container">
<h2>Sidebar Navigation Example</h2>
<p>The sidebar with is set with "style="width:25%".</p>
<p>The left margin of the page content is set to the same value.</p>
</div>

</div>

     
Other  Style
<title>W3.CSS</title>
<meta name="viewport" content="width=device-width, initial-scale=1">
<link rel="stylesheet" href="https://www.w3schools.com/w3css/4/w3.css">
<body>

<!-- Sidebar -->
<div class="w3-sidebar w3-bar-block w3-border-right" style="display:none" id="mySidebar">
  <button onclick="w3_close()" class="w3-bar-item w3-large">Close &times;</button>
  <a href="#" class="w3-bar-item w3-button">Link 1</a>
  <a href="#" class="w3-bar-item w3-button">Link 2</a>
  <a href="#" class="w3-bar-item w3-button">Link 3</a>
</div>

<!-- Page Content -->
<div class="w3-teal">
  <button class="w3-button w3-teal w3-xlarge" onclick="w3_open()">☰</button>
  <div class="w3-container">
    <h1>My Page</h1>
  </div>
</div>

<img src="img_car.jpg" alt="Car" style="width:100%">

<div class="w3-container">
<p>This sidebar is hidden by default, (style="display:none")</p>
<p>You must click on the "hamburger" icon (top left) to open it.</p>
<p>The sidebar will hide a part of the page content.</p>
</div>

<script>
function w3_open() {
    document.getElementById("mySidebar").style.display = "block";
}
function w3_close() {
    document.getElementById("mySidebar").style.display = "none";
}
</script>
   
Use this Code
<div class='sidetabs' id='sidetabs'>
      <ul class='menu-tab'>
        <li class='item-1'><a href='#tabside1'/></li>
        <li class='item-2'><a href='#tabside2'/></li>
<li class='item-3'><a href='#tabside3'/></li>
      </ul>
      <b:section class='sidebar ty-trigger' id='tabside1' maxwidgets='1' name='Tab 01' showaddelement='yes'>
        <b:widget id='HTML3' locked='false' title='Recent' type='HTML' version='1'>
          <b:widget-settings>
            <b:widget-setting name='content'><![CDATA[<span class="latestposts" data-no="5"></span>]]></b:widget-setting>
          </b:widget-settings>
          <b:includable id='main'>
  <!-- only display title if it's non-empty -->
  <b:if cond='data:title != &quot;&quot;'>
    <h2 class='title'><data:title/></h2>
  </b:if>
  <div class='widget-content'>
    <data:content/>
  </div>

 <!--b:include name='quickedit'/-->
</b:includable>
        </b:widget>
      </b:section>
      <b:section class='sidebar ty-trigger' id='tabside2' maxwidgets='1' name='Tab 02' showaddelement='yes'>
        <b:widget id='PopularPosts1' locked='false' title='Popular' type='PopularPosts' version='1'>
          <b:widget-settings>
            <b:widget-setting name='numItemsToShow'>5</b:widget-setting>
            <b:widget-setting name='showThumbnails'>true</b:widget-setting>
            <b:widget-setting name='showSnippets'>true</b:widget-setting>
            <b:widget-setting name='timeRange'>LAST_YEAR</b:widget-setting>
          </b:widget-settings>
          <b:includable id='main'>
                <b:if cond='data:title != &quot;&quot;'><h2><data:title/></h2></b:if>
                <div class='widget-content popular-posts'>
                  <ul>
                    <b:loop values='data:posts' var='post'>
                      <li>
                        <b:if cond='!data:showThumbnails'>
                          <b:if cond='!data:showSnippets'>
                            <!-- (1) No snippet/thumbnail -->
                            <a expr:href='data:post.href'><data:post.title/></a>
                            <b:else/>
                            <!-- (2) Show only snippets -->
                            <div class='item-title'><a expr:href='data:post.href'><data:post.title/></a></div>
                            <div class='item-snippet'><data:post.snippet/></div>
                          </b:if>
                          <b:else/>
                          <!-- (3) Show only thumbnails or (4) Snippets and thumbnails. -->
                          <div expr:class='data:showSnippets ? &quot;item-content&quot; : &quot;item-thumbnail-only&quot;'>
                            <b:if cond='data:post.thumbnail'>
                              <div class='item-thumbnail'>
                                <a expr:href='data:post.href'>
                                  <img border='0' expr:alt='data:post.title' expr:height='data:thumbnailSize' expr:src='data:post.thumbnail' expr:width='data:thumbnailSize'/>
                                </a>
                              </div>
                            </b:if>
                            <div class='item-title'><a expr:href='data:post.href'><data:post.title/></a></div>
                            <b:if cond='data:showSnippets'>
                              <div class='item-snippet'><data:post.snippet/></div>
                            </b:if>
                          </div>
                          <div style='clear: both;'/>
                        </b:if>
                      </li>
                    </b:loop>
                  </ul>
                 <!--b:include name='quickedit'/-->
                </div>
              </b:includable>
        </b:widget>
      </b:section>
  <b:section class='sidebar ty-trigger' id='tabside3' maxwidgets='1' name='Tab 03' showaddelement='yes'>
    <b:widget id='HTML5' locked='false' title='Comments' type='HTML' version='1'>
      <b:widget-settings>
        <b:widget-setting name='content'><![CDATA[<span class="latestcomments" data-no="5"></span>]]></b:widget-setting>
      </b:widget-settings>
      <b:includable id='main'>
  <!-- only display title if it's non-empty -->
  <b:if cond='data:title != &quot;&quot;'>
    <h2 class='title'><data:title/></h2>
  </b:if>
  <div class='widget-content'>
    <data:content/>
  </div>

 <!--b:include name='quickedit'/-->
</b:includable>
    </b:widget>
  </b:section>
     </div>
Note -If you have any problem then just comment me.

Friday, April 13, 2018

Download best seo ready template for blogger

Download best seo ready template for blogger

Download best SEO ready template for blogger 

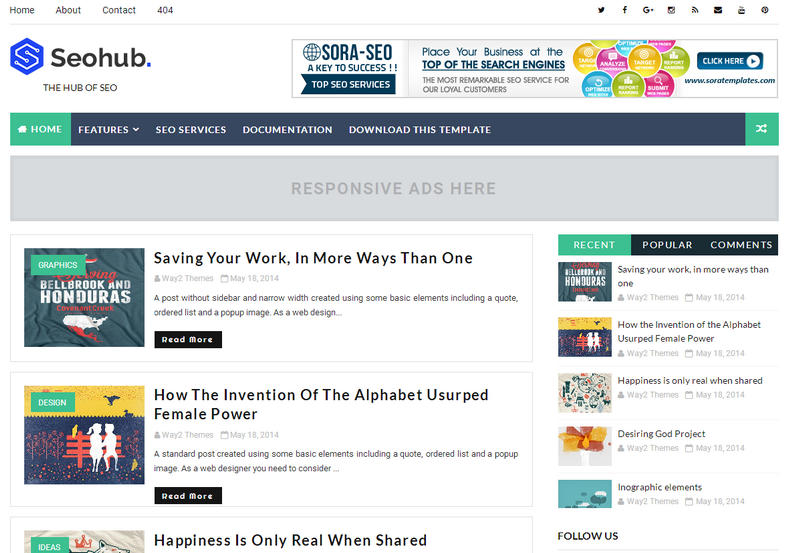
1.Seo  Hub

What is SEO ready template?
Seo ready template is destined for involuntary articles management. It manages the posts very nicely. We don't need to waste time on managing title and other things.SeoHub Fast Loading Blogger Template is the most SEO optimized blogger template in current date, the template has lots of unique features and perfectly optimized codes to perform great in various search engines. You can use this template for almost any kind of blog but it is best suitable for niche blogs, tech, news, blog, magazine, daily blogs, food blogs, authority and best for event blogs


Features: Responsive • Tabbed Widget• Seo Friendly • Ads Ready • Slideshow • Instagram Ready   • Social Bookmark Ready • Drop Down Menu • Vertical Drop Down Menu • Browser Compatibility• Email Subscription Widget • Post Thumbnails • WhatsApp Sharing

• Breadcrumbs Navigation  • Page Navigation • Footer Column • Sidebars • Fast Loading  Styles: Magazine • Minimalist • Portfolio • Simple• Clean • Modern • Elegant • Wordpress Themes Looks • Gallery • 3D Style • Stylish

Topics: Movie • Anime • Personal Pages• News • Photography• Music • Video • Culture   • Business • Fashion • Games

Columns: 1 Colum • 2 Columns • 3 Columns • 4 Columns


                              Live Preview                                                                                         Download 


If you want premium then you can also buy it.

2. Tech Wise
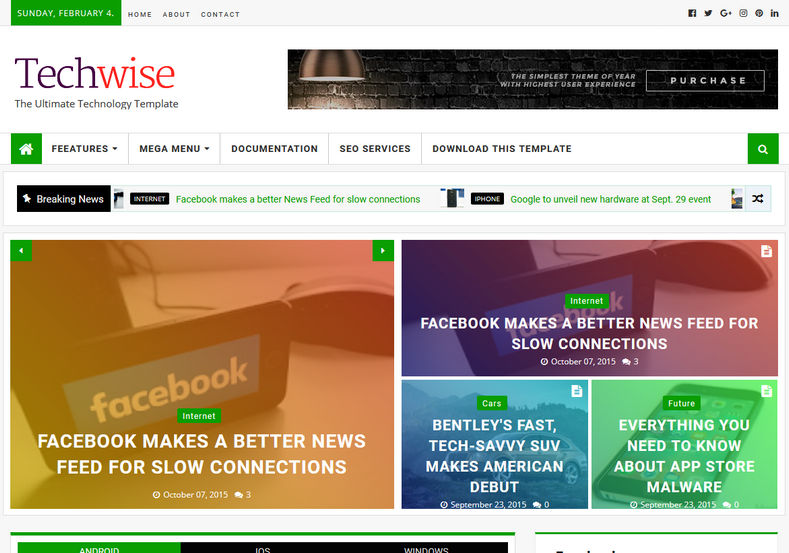
TechWise Blogger Template is a pure tech niche Blogspot theme with highly optimized and responsive design. It can fit any screen size or device with ease and will maintain the same design from desktop to smartphone. Perfectly suitable for technology, games, travel destinations, films, blogger magazines, technology etc. It is an extremely customizable theme, which has many different types of layout, whether you want a cleanblog with a slider or a full magazine template, you can make your very own design and can make it nice. Made with latest trends and technologies it fully SEO ready theme and since it has pre-installed various types of recent post widgets it also helps in reducing bounce rate magically.


Live Preview

Download               


It is also an SEO based theme. But it is especially for technology and news-based websites.
Features-
Features: Responsive • Tabbed Widget• Seo Friendly • Ads Ready • Slideshow • Instagram Ready   • Social Bookmark Ready • Drop Down Menu • Vertical Drop Down Menu • Browser Compatibility• Email Subscription Widget • Post Thumbnails • WhatsApp Sharing

• Breadcrumbs Navigation  • Page Navigation • Footer Column • Sidebars • Fast Loading  Styles: Magazine • Minimalist • Portfolio • Simple• Clean • Modern • Elegant • Wordpress Themes Looks • Gallery • 3D Style • Stylish

Topics: Movie • Anime • Personal Pages• News • Photography• Music • Video • Culture   • Business • Fashion • Games
Columns:

3. Sora Coin
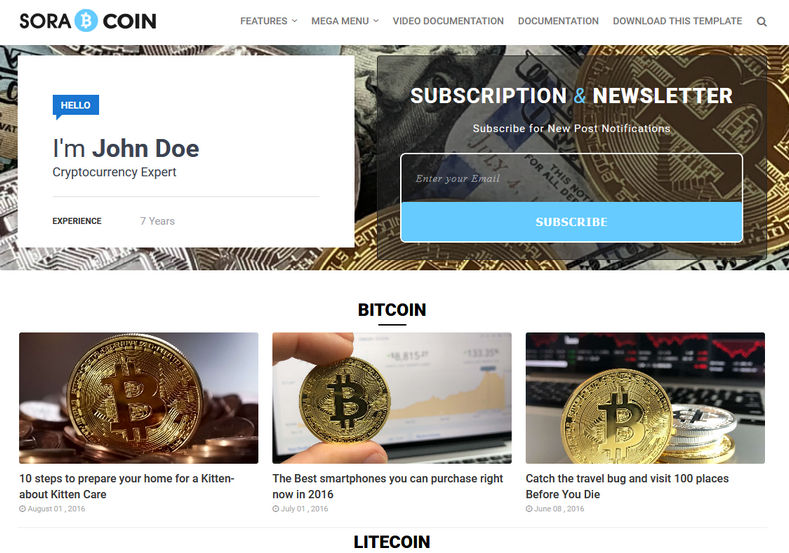
This is one of the delightful templates for blogger websites that are SEO based that you can download Below options and if you want any customization help then just comment me. Sora Coin Blogger Template is a lovely blogger website template envisioned for bitcoin cryptocurrency blog and exchange websites. This template is designed by best company and has made best templete. Sora Coin template has a best friendly layout. It fits smoothly on numerous displays and resolves from steady desktop screens to tablets, iPads, iPhones and small mobile devices.


Sora Coin Blogger Template is a minimal blogspot theme specially for cryptocurrency and ico in mind. It is very fast loading and targetted for finance niche.
Live Preview                           Buy Premium                                          Free  Download

 Features:
Features: Responsive • Seo Friendly • Post Thumbnails • Ads Ready • Slideshow • Drop Down Menu • Vertical Drop Down Menu • Email Subscription Widget   • Footer Column • Sidebars • Fast Loading • Instagram Ready  • Breadcrumbs Navigation  Page Navigation

Styles: Minimalist, • Wordpress Themes Looks • Elegant  Magazine   • Stylish   • Gallery  • Portfolio • Simple • 3D Style  • Clean • Modern 

Topics: Movie  • Photography• Fashion • Games • Culture • Personal Pages • Anime • News• Music • Video • Business 

Columns: 1 Colum • 2 Columns • 3 Columns • 4 Columns


  • Note- If you have any complaint about this template then just search SEO based template. I know it will show this definitely.